
Parts:
OK, let's do this!
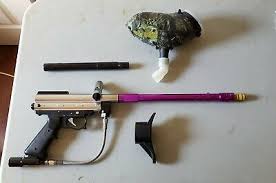
After taking the grip frame from the body, disconnect all the hoses from the PTC connectors on the banjos and pull the wire harness for the eyes and the eye board. You'll end up with something like this pic from ZDSPB.com:

- Next you'll need to pull the 1/8" hose from the plastic barb on the board.
BE CAREFUL! If you want the ability to change back to electropneumatic, the barb can be fragile. Be super gentle as you are pulling it off the board. If you don't care, go to town on it, but being gentle will keep you on track without having to trim any bits of the hose off - Next, pull the larger stock hoses from the Solenoid Head
- Push the hoses onto the T33-2 t barb
- Push the opposite end of the 1/8" hose onto the back end of the SMAV-3 (NO Inlet (1))
- Note: NC Inlet (3) is not used
- Take the cocker hose and run it from the SMAV-3 (Outlet (2)) to the 1/8" PTC connector on the Front Banjo Bolt of the Firing Can
It should look something like this pic from SSC's kit:

- Push the 2 4mm hoses into their original 5/32" PTC connectors on the Banjos
At this point, you can officially air it up and cycle it to test for leaks and proper plumbing. You can also take this time to measure your cocker hose going from the SMAV-3 to the PTC. Trim as needed and make sure you have enough room for all the hoses to live in the tray, while not pinching off any air.
Here's a cleaner view of how your layout should look:

At this point, you can install your SMAV-3 to your mount of choice, adjust trigger as needed. Once you you've got it all buttoned up, go have some fun!
A couple of takeaways:
- This is a base build - There are more things to buy to make it even better.
- Stock/single oring bolt - There is no seal for the air when you keep the trigger pulled. It will just dump all kinds of air. you need to be really quick and crisp with your trigger pulls. (Think of trying to rip with a Cocker.)
- You can cut your own channel for a dual tail oring.
- Thanks to Jordan from MCB for supplying this diagram!

- It's also been said that you can send stock bolts to SSC to get them cut for cheap
- Confirmed! The work is good!
- Moar air stuff - A 360 QEV will help with air efficiency too.
- No Safety - With how tiny the trigger pull is, you need to be really aware of your trigger control. Adding an on/off ASA can help with this.
- If you aren't about that DIY life by sourcing all of your own parts, you can get the drop in kit from SSC.
- Speaking of SSC, while I developed my own SMAV-3 mount, it's not ready for prime time and I recommend getting theirs... for now.
- Air efficiency isn't great without updating the bolt to dual tail and getting a QEV. I can do 2 rounds with a hopper and maybe 1 to 1.5 pods before I have to get more air on my 48/3000 HPA tank.
- That's roughly 400-450-ish rounds, so if you are playing at home, this is pretty under the rough calc for 480 shots on a 48/3000.
- You can use a 68/4500 but that's a bandaid to the air efficiency problem.
- I'll be doing a top to bottom air efficiency video soon once I've got all the parts to compare

If you haven't seen the shooting vid on my other thread, here ya go!
What's great about this build is that once you have all your parts assembled, it's only about 15 minutes of work!
SMAV-3 Mounts
People on MCB (and via other sources) have asked about mounts. I've previously talked about the mount I designed as well as the one from Super Stanchy Customs. For the record, the SSC mount is great! It's well designed. The mount has multiple points with set screws for fine tuning your trigger engage point on the trigger. (See the 2nd pic, above.)
 |
| v3 never made it to the printer! |
Some of the process was measuring and looking at the specs of the SMAV-3 and printing a couple of test pieces.
Rinse and repeat.
 After making 5 total versions, I was able to make something that not only looked good, it was highly functional! It only required 1 setscrew, the height is adjustable by utilizing the original board slot, the back end is angled to provide additional reinforcement/distribute stress to the back of the grip frame instead of only on the rail and setscrew, and there are recesses for the grip panel screws to act as additional mount points.
 General Dimensions:
- SMAV-3 Mount hole - 1/4"
Allow for extra tolerances to slide it in since it's mounted by a threaded nut or you'll have to do some sanding - SMAV-3 Mount Tab - 4.00mm
- Minimum Distance SMAV-3 - 3.75mm (From Center)
- Full Mount Length - 20.25mm
- Full Mount Height - 20.00mm
- Full Mount Width - 13.50mm
- Mount Deck Height - 9.50mm
I let off the extra nuances for the large set screw, grip covers mount points, and rail since these things aren't for everyone. If you are designing your own to model/print or fully machine, this should get you started!


0 Comments